BIGTREETECH Octopus v1.1
Wiring
You will probably have to swap the outer two wires (red and white) on the board end of the cable but double check to make sure.
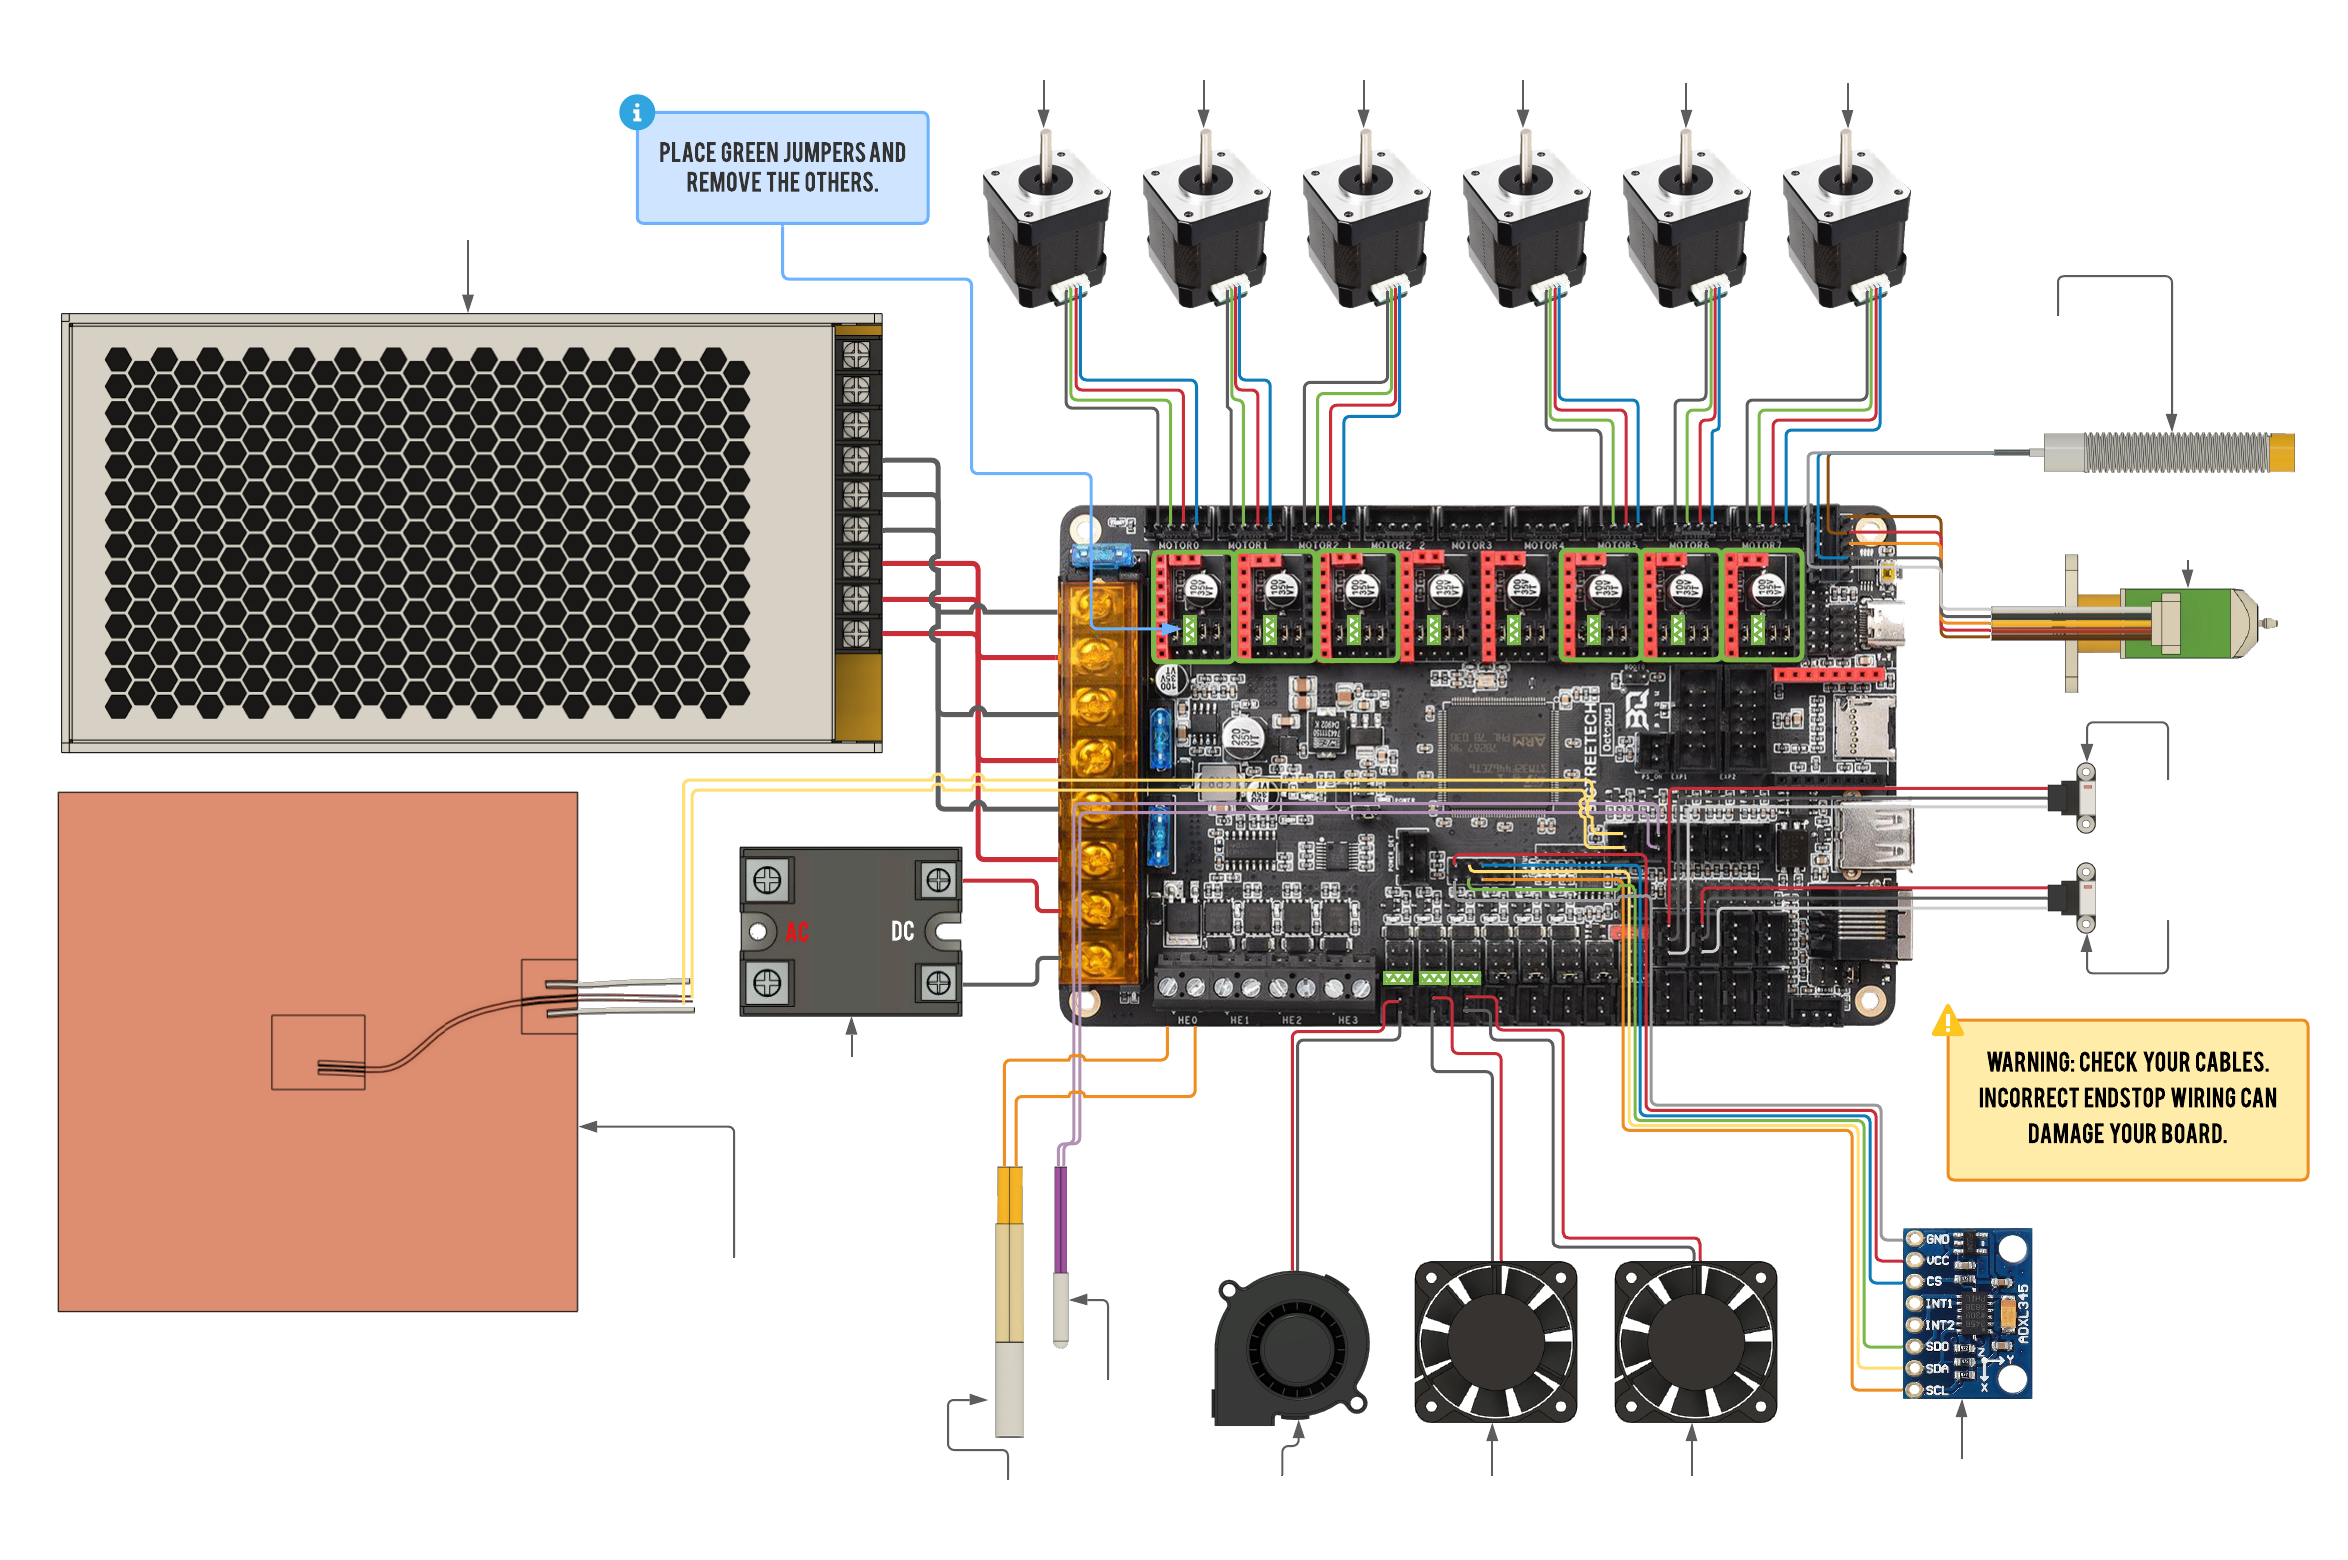
![]() A green square with triangles inside is where you would place a jumper,
remove all jumpers on the board that are not marked by this symbol.
A green square with triangles inside is where you would place a jumper,
remove all jumpers on the board that are not marked by this symbol.
Firmware installation
Make sure your board is connected to the Pi via the provided USB-C cable (USB-C on the Octopus, USB-A on the Pi).
Download the firmware-btt-octopus-11.bin from the firmware_binaries folder found on the Machine page of Mainsail, copy it onto the SD card that goes into your control board and call it firmware.bin, then insert the SD card in to the control board. Here are the steps in chronological order:
- Navigate to http://RatOS.local/
- Open Machine page
- Open
firmware_binariesfolder - Download
firmware-btt-octopus-11.bin - Format the sd card for your board to FAT16 (sometimes just called FAT), or FAT32 with a clustersize of 8kb or 4kb.
- Copy
firmware-btt-octopus-11.binonto the sd card for your board - Rename
firmware-btt-octopus-11.bintofirmware.bin. Please be wary of file extensions! If the file doesn't already show .bin, don't add it! - Safely eject the SD card through your operating system.
- Physically take out the sd card and insert it into your control board.
- Power cycle your printer or control board. Remember to shut the pi down properly before you cut power to your Pi (you can do that through Mainsail using the dropdown menu in the top right corner).
- Verify that the firmware has been flashed and do not leave the sd card in the board after successful flashing
If you don't know how to make Windows Explorer show file extensions, see this article on HowToGeek
You can verify if the board flashed correctly by checking if the firmware.bin file has been changed to firmware.CUR on the SD card. If you have trouble flashing the control board, start unplugging your wires beginning with the endstops, sometimes faulty wiring can cause the board to not boot properly.
Once you have verifed the board has been succesfully flashed, do not reinsert the SD card. If the SD card remains in the board, the automatic flashing will not work.
If you're going through initial setup please continue in the installation guide
Manual firmware upgrade
Sometimes klipper makes changes to the microcontroller code and thus your MCU need to be reflashed with new firmware. You can do that in 2 ways.
RatOS automatically flashes the newest firmware to your Octopus v1.1 when klipper is updated (if the klipper firmware has previously been flashed). You shouldn't need any of the steps below unless that fails.
SD Card
If you're not used to the command line or haven't used SSH before, the easiest way is to download the firmware file from Mainsail and put that onto an SD card (renaming it to firmware.bin). Everytime klipper is updated, the firmware for the connected board is compiled and put into the firmware-binaries folder which you can find under the "Machine" tab. The process for this is the same as in the Firmware Installation step.
You can verify if the board flashed correctly by checking if the firmware.bin file has been changed to firmware.CUR on the SD card. If you have trouble flashing the motherboard, start unplugging your wires beginning with the endstops, sometimes faulty wiring can cause the board to not boot properly.
Once you have verifed the board has been succesfully flashed, do not reinsert the SD card. If the SD card remains in the board, the automatic flashing will not work.
Flashing via USB
Another option is to SSH into the pi using something like PuTTy or ssh pi@RatOS.local via the commandline on OS X and Linux machines. Execute sudo ~/klipper_config/config/boards/btt-octopus-11/make-and-flash-mcu.sh and the Pi will compile the klipper firmware and flash the board for you.
Be sure to remove the SD card from the board before attempting to flash, if one is in there.